


In this write, I want to show two ways to create custom directory trees by using the tree-extended tool:
- By using directly tree-extended in your SO command line by installing it as a node package.
- Or, by using the tree-extended vscode extension.
Why tree-extended?
I was documenting one of my projects and I wanted to write in markdown a directory tree representation, but I didn’t want to show all the directories but a particular one, the one that I was talking about in that section in the document. There is a command for Linux named tree that you can install, but it didn’t match all the requirements I was looking for. That is why I created tree-extended as a custom implementation of tree.
Using tree-extended in the command line
First, we need to be sure we have installed NodeJs >= 6.x in our Mac or Pc.
Then just open your terminal and run npm install tree-extended -g . This line will install this npm package globally, in this way you will be able to run the tree-extended command in your terminal.
Ok. Now we have it installed. We can runtree-extended -h to see the help. Here we get all the features we can do:
- Specify a max tree depth we want to get
- Specify what to do when we got this max tree depth: print
...or nothing - We can choose a charset to use, currently
ascii,utf8, andutf8-icons - We can choose if we want to ignore the items defined in the
.gitignorefile. - We can filter the items, by defining
ignoreandonlyfilters. Here is the true magic. We can create these filters at tree-deep levels. For example:aaa, bbb, 0:ccc, 3:ddd, 3: ffff, 5:eee ..., this means:aaaandbbbare global,cccis a filter that will apply to the root level,dddandffffwill be applied to level 1, and so on…
One interesting example
Having this complete directory:
├───a/
│   ├───aa/
│   ├───ab/
│   └───ac/
├───a1/
├───b/
│   ├───ba/
│   │   ├───bafile1.txt
│   │   └───bafile2.txt
│   ├───bb/
│   ├───bc/
│   │   └───bca/
│   │       └───bca-file1.txt
│   ├───bd/
│   └───bfile1.txt
├───c/
├───c1/
└───d/
    ├───d1/
    └───d2/
We run this command: tree-extended -only="0:b, 1:bc, 2:bca" and we get:
├───b/
│   └───bc/
│       └───bca/
│           └───bca-file1.txt
└───ba/
We can see that we can restrict the search to only show one path to a file or to a directory. But we are doing it here by using0:b (at level 0 restrict to items matchingb). The problem is that this pattern (b) also matchba/. To avoid this, we can use regular expressions in the patterns:
Now run instead: tree-extended -only="0:b$, 1:bc, 2:bca" and we get:
└───b/
    └───bc/
        └───bca/
            └───bca-file1.txt
In this way, by using 0:b$ we are using a regular expression that means: match all items ending in b . In this way, we exclude ba/ from the result.
You can find more examples and use cases by going directly to the library web.
Using tree-extended VsCode Plugin
To make this easier to use I decided to create an extension for VsCode. To install it just go to the Extensions Menu item and search for the tree-extended extension.
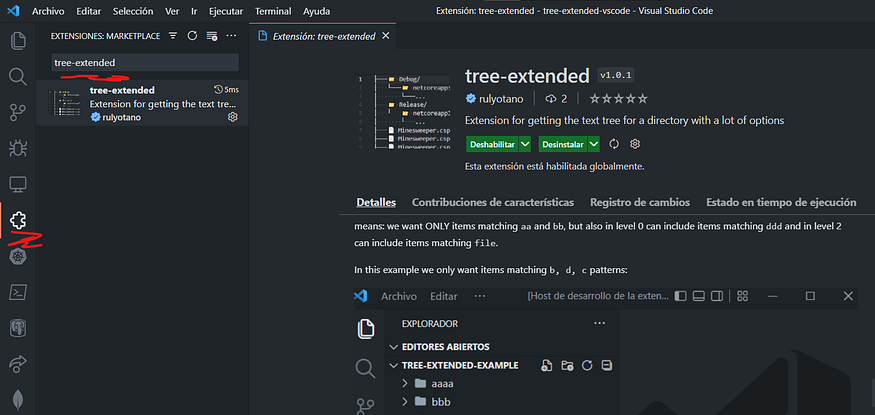
Go to the Extension Menu and search ‘tree-extended’
Now, to use it, is as simple as right-clicking on the directory you want to get the tree and clicking Get tree representation
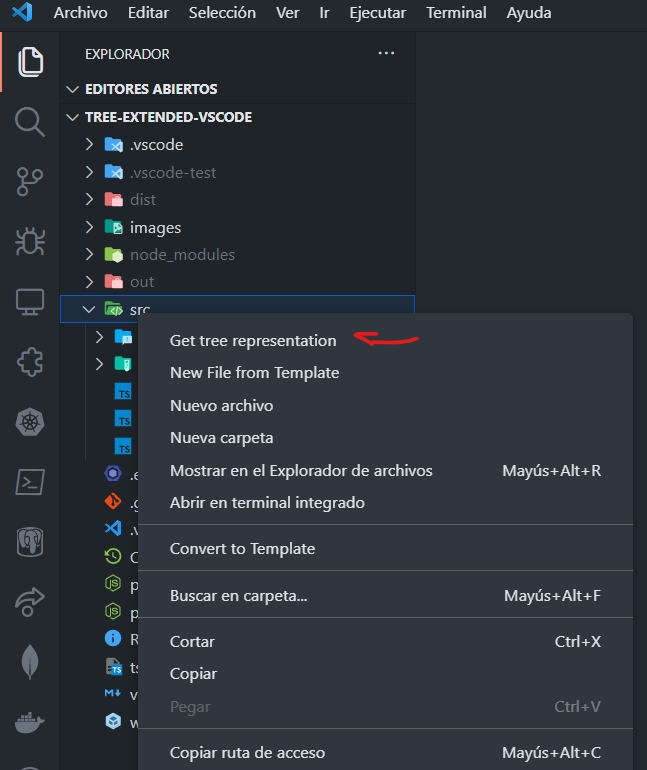
Right-click on /src and then click ‘Get tree representation’
After this, the extension is going to ask if you want to use a custom configuration or the default one:
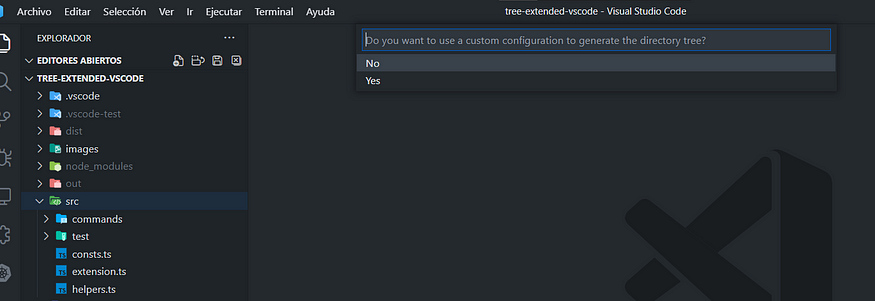
Choose not to use a custom configuration
By choosing No and we are going to use the default configuration (we can change it in the plugin configuration settings)
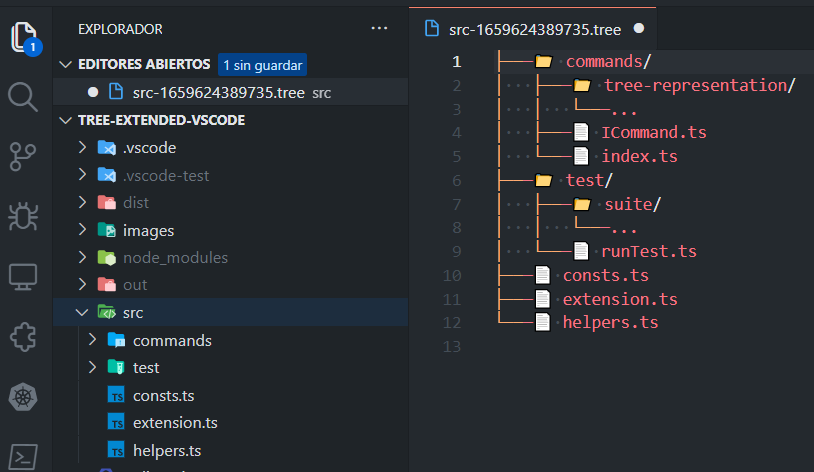
Result when using the default configuration for /src directory tree
If we click Yes to use a custom configuration we are able to specify the maximum directory tree deep and the only and ignore filters:
Using custom configuration to create the directory tree
To customize the rest of the options, we go to the plugin configuration settings:
Changing plugin configuration settings
And that’s it! Feel free to play with it, maybe it is helpful to you in the future.